Vendors — Controller Guide
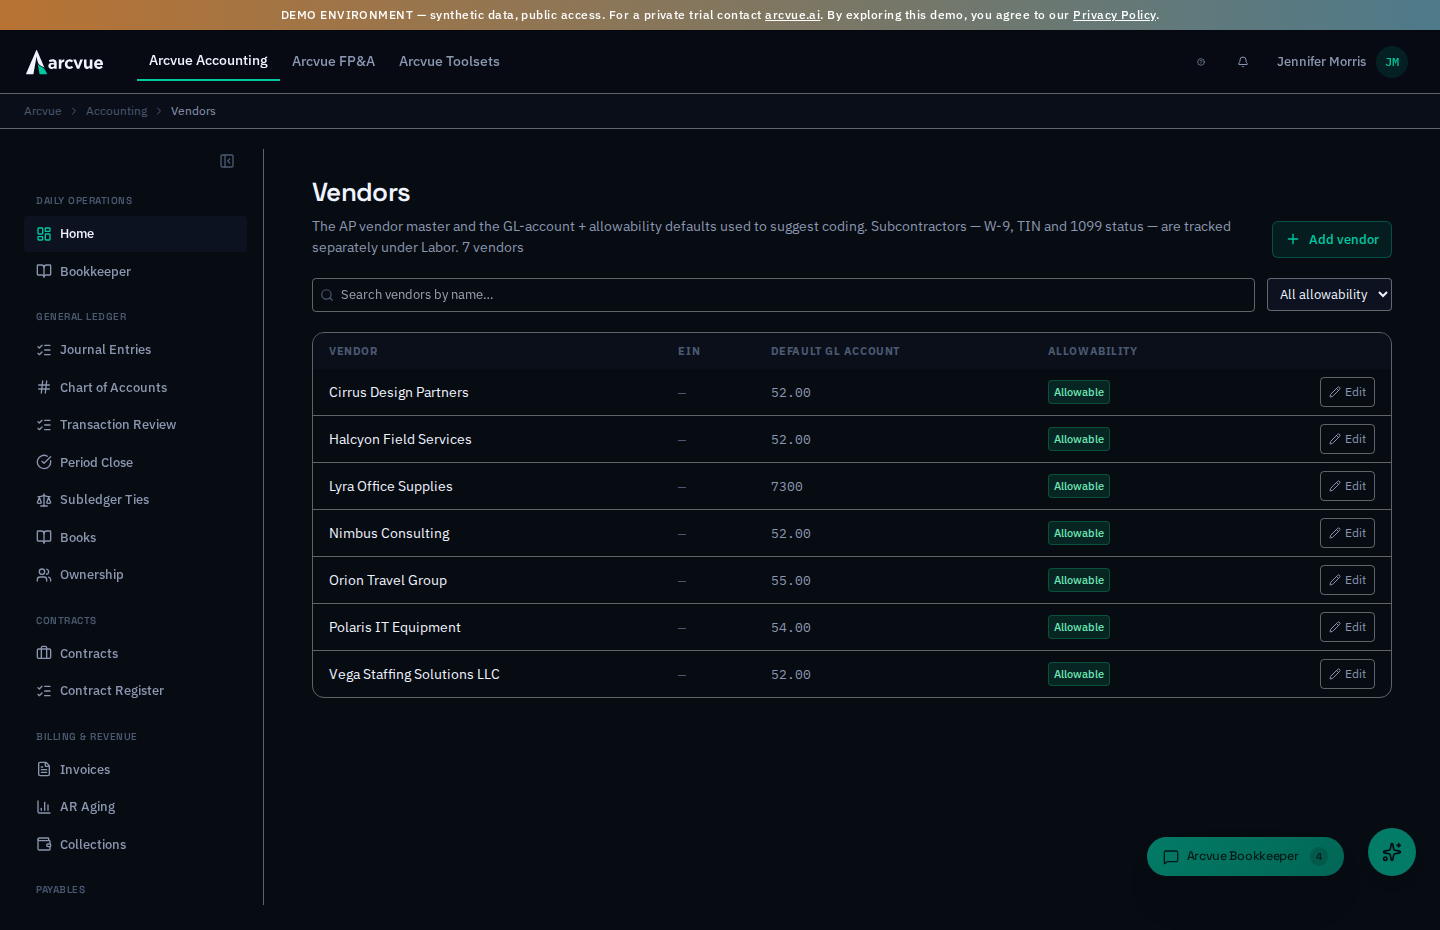
The vendor master is the list of parties you buy from, and the place each one's default coding account and allowability treatment are set. When a bill arrives, the coding engine starts from what this list says about that vendor — so a wrong default here becomes a wrong code on every bill from that vendor until somebody notices. This guide is the controller's doorway onto that list; the administrator's guide to the same screen, with every field explained, is Accounting Settings → Vendors.
For: controllers and bookkeepers · Time: ~5 minutes · You'll need: the Accounting module; editing needs an admin, controller, CFO or CEO role — everyone else sees the list read-only.
In the left nav, open Accounting → Payables → Vendors (/accounting/vendors). The page header reads Vendors. The same screen sits in the Admin Console under Accounting → Vendors — two doorways onto one list, by design: an administrator manages it, a controller uses it. The screen has two tabs: Vendors, the list itself, and Approval, where somebody decides which payees may be paid at all.
Part 1 — The ideas you need first (read once)
Subcontractors are not here
They have their own register under Accounting → Labor → Subcontractors, because they carry things a vendor does not: a W-9 on file, TIN matching, backup withholding and 1099 status. A party can exist in both — buying from someone and 1099-ing them are different relationships. See Subcontractors & 1099.
What each column decides
| Column | What it decides |
|---|---|
| Default GL account | The account a bill from this vendor codes to when nothing more specific applies. The single highest-leverage field on the row. |
| Allowability | Whether costs from this vendor are treated as allowable under FAR 31 — Allowable, Unallowable, Partial, or Review (the default until you set it). A vendor whose spend is entertainment or lobbying is marked here once rather than on every bill. |
| EIN | The tax identity. Needed before any 1099 work, and the thing that makes two spellings of one company resolvable to one party. |
| Payment terms | When a bill from this vendor arrives without a due date of its own, the terms here supply one — Net 30 makes it due 30 days after the invoice date. Left at Not stated, that bill is aged from the invoice date instead, so it can show as overdue before the vendor expects to be paid. A due date written on the bill itself always wins. |
Billable or non-billable is a separate fact, set from Payables
Whether a vendor's costs pass through to a contract (billable, landing on the billable trade payable) or are the company's own (non-billable — rent, software, insurance) is not on this screen. It is asked once, per vendor, in the Parties to tag panel at the top of Accounts Payable the first time a bill from an untagged vendor arrives — see Accounts Payable, Step 0. Tagging there also creates the vendor record if it did not exist yet.
What Arcvue deliberately will not do
- It won't rename a vendor. The name is the permanent key; a vendor created under the wrong name gets a correct sibling and future activity routed there.
- It won't delete a vendor. Transactions and subcontractor records reference it, so it simply stops accumulating activity.
- It won't guess a default account. Until you set one, coding falls back to the bill's own evidence.
Approving the payee is not approving the invoice
Arcvue has always approved the invoice. The Approval tab approves the party — a separate control, and the one an auditor asks about, because it is what shows that admitting a payee to the file and deciding it may be paid were two different decisions.
Nothing is enforced until somebody turns it on. Until then approvals are recorded and payments run exactly as they do today. The switch states which mode you are in, and while it is off it tells you how many payees would become unpayable the moment you turn it on — review them first, then switch.
Part 2 — How to run it
Step 1 — Find a vendor
Search by name in Search vendors by name… and, if useful, narrow with the allowability filter (All allowability, or one status). The table shows Vendor, EIN, Default GL account, Allowability and Payment terms. The list is capped at 500 rows, so narrow the search on a long vendor book.
Step 2 — Add one
One button carries both modes and its label is the mode: it reads
Create vendor when you are adding and Save changes when you opened an
existing record. A button reading Save changes means you are editing
something that already exists, so check which vendor you are in before saving.
Press Add vendor and set the Vendor name (unique, and it cannot be changed later — enter the legal name you want on reports), the EIN (optional), the Default GL account (optional, picked from your active chart of accounts), and the Default allowability. Create.
Step 3 — Correct one
Press Edit on the row. Everything except the name can be changed. When a bill coded to the wrong account, fix both, in this order: recode the bill so this period is right, then correct the vendor's default so the next bill arrives correctly. Fixing only the bill means doing it again next month.
Step 4 — Approve a payee
The requirement itself is a switch, and it names the action rather than the
state: Turn on starts requiring payee approval, and Turn off stops.
So a button reading Turn off means the requirement is currently ON.
With the requirement off, an empty worklist means nothing is being asked for — not that everything is approved. The screen says as much: nothing is waiting on you until the requirement is turned on.
Open the Approval tab. Three sub-tabs: Awaiting review, Approved and Rejected. Work down the queue one payee at a time — there is deliberately no approve-all, because the value of a recorded approver is that a person looked at that party, and one click over a whole list is a signature on nothing.
Each row carries what you need to judge it: Payee, EIN, Bills (how many non-void bills it has ever had), Billed (the total, voids excluded), Activity (first and last bill dates), and Added by — which reads Decided by once you have ruled on it. Then Approve or Reject.
- A payee with no bills is either one you have just set up or a duplicate somebody created with a typo. Those need opposite decisions and only you can tell them apart, so read the name before approving.
- An employee carries a badge. You pay them expense reimbursements rather than invoices, so approve them on that basis.
- A missing EIN is not a reason to refuse on its own. It does stop you filing a 1099, so collect a W-9 and add it on the Vendors tab before year end.
- Nothing is permanent. Undo on the Approved or Rejected tab returns a payee to the queue and clears the recorded approver — an attestation must not outlive the decision that produced it — so a decision made in error costs nothing to correct.
Without an editing role the tab reads View only.
Payment terms (optional) is a picker, not a text box, and its unset value
reads — not stated —. It is genuinely optional, and the screen tells you
what each choice costs you:
- Stated — a bill that arrives without its own due date becomes due that many days after the invoice date. A due date on the bill itself always wins.
- Not stated — an undated bill is aged from the invoice date. That shows it overdue EARLIER than this vendor actually requires payment, so the cost of leaving it blank is chasing a bill that is not yet late.
Cancel closes the form without saving.
Part 3 — When something looks wrong
"The same company appears twice." Usually two spellings of one name arriving from different feeds. Point future activity at the survivor and let the other stop accumulating — the EIN is what tells you they are the same party.
"A vendor is here but not in Subcontractors, or the other way around." Normal, not an error. The vendor list is who you buy from; the subcontractor register is who you may need to issue a 1099 to. Many parties are one and not the other.
"I can see the list but there is no Edit." You do not hold an editing role. The screen says so — Read-only — vendors can be edited by an admin, controller, or CFO.
"I need to change a vendor from billable to non-billable." The tag is set once, from the Parties to tag panel on Accounts Payable, and this screen does not yet offer a way to change it afterward. Choose carefully when the panel asks; if one is wrong, raise it with your administrator.
"A payment was refused and the payee looks fine." Enforcement is on and that party has not been approved yet. Approve it on the Approval tab — the switch at the top of that tab is what turns the requirement on and off.
"I approved every vendor and a bill still refuses." That bill names no payee at all, which is a different problem with a different fix: the bill has to be attributed to a payee first. The Approval tab counts those separately for exactly this reason — approving the whole list will never clear one of them.
One-line summary
Accounting → Payables → Vendors is the controller's doorway onto the vendor master: each row's Default GL account and Allowability drive how every bill from that vendor is coded, the EIN is what makes two spellings one party, and the billable / non-billable question is answered once in the Parties to tag panel on Accounts Payable rather than here. The Approval tab beside it answers a different question — which payees may be paid at all — and enforces nothing until somebody turns it on.
Related
- Every field on this screen, for administrators → Accounting Settings → Vendors
- The bills these defaults code → Accounts Payable
- The 1099 register that is deliberately separate → Subcontractors & 1099